
Desserts
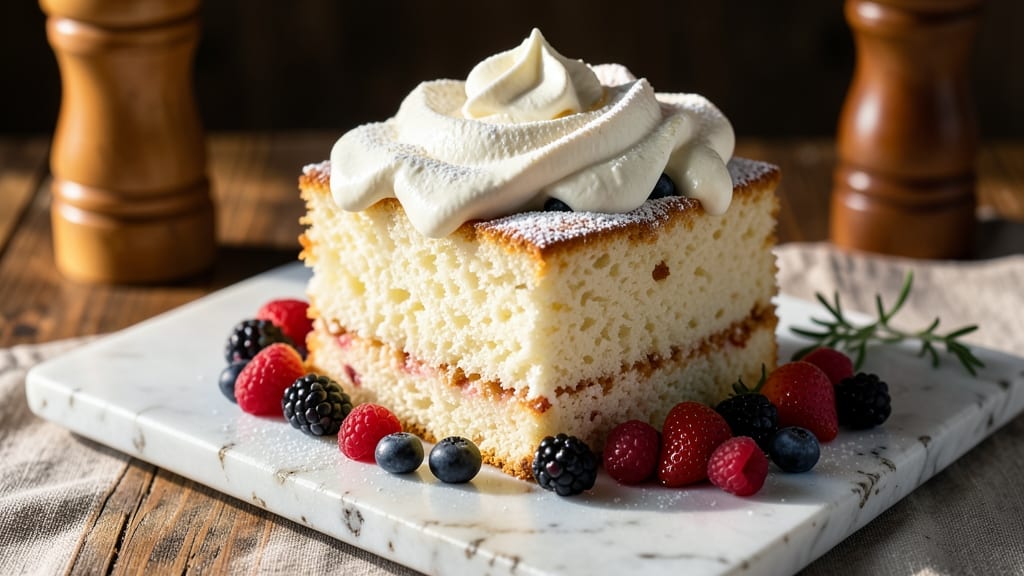
This angel food cake with berries and whipped cream recipe delivers the perfect balance of fluffy, light cake and vibrant fruit layers that look as stunning as they taste. 💛 The secret lies in a foolproof baking technique that creates airy, tender crumbs without a trace of heaviness—ideal for warm weather or special occasions when you want something elegant yet effortless.
What sets this recipe apart is the assembly process, where each layer of cake is separated by fresh berries and topped with billowy whipped cream. The berries add natural sweetness and a pop of color, while the whipped cream ties everything together with its smooth, cloud-like texture. No one will believe it's made with just a few simple ingredients and basic equipment.
The result is a dessert that's light enough to enjoy without feeling weighed down, yet rich in flavor and visual appeal. Each slice reveals delicate layers of cake, juicy berries, and fluffy cream—perfect for celebrating birthdays, holidays, or simply treating yourself to something extraordinary. The best part? It comes together in just under an hour, with minimal active time.
Whether you're serving a crowd or indulging in a solo slice, this recipe guarantees a showstopping dessert that tastes as good as it looks. The key is patience during baking and careful assembly—trust the process, and you'll achieve restaurant-quality results at home. Let's get started!
Ingredients for angel food cake with berries and whipped cream
Twelve egg whites, three cups of berries, and a touch of vanilla—everything you need for showstopping layers!
| Ingredient | Amount | Notes |
|---|---|---|
| Large Egg Whites 🥚 | 12 whole | Room temperature, no yolks |
| Granulated Sugar 🍚 | 1 ½ cups | Superfine preferred for smooth texture |
| All-Purpose Flour 🌾 | 1 ½ cups | Sifted, no substitutions |
| Cream of Tartar 🧂 | 1 ½ tsp | Essential for stability |
| Vanilla Extract 🌸 | 1 tsp | Pure, high-quality extract |
| Salt 🧂 | ½ tsp | Fine sea salt preferred |
| Fresh Mixed Berries 🍓 | 3 cups | Strawberries, blueberries, raspberries |
| Heavy Whipping Cream 🥛 | 2 cups | Cold, full-fat for best texture |
| Powdered Sugar 🍚 | 1 cup | For sweetening whipped cream |
| Lemon Juice 🍋 | 1 tbsp | Freshly squeezed, for cream stability |
| Unsalted Butter 🧈 | 2 tbsp | Softened, for cake pan prep |
The egg whites are your secret weapon here—room temperature makes all the difference for volume. Grab the freshest you can find (check the carton date) and let them sit out for 30 minutes before whipping. Trader Joe's and Whole Foods usually have the best quality, or just crack open a dozen eggs and separate them yourself. The berries? Local farmers markets have the juiciest, but any mix of fresh strawberries, blueberries, and raspberries works—just rinse them well and pat dry. For the flour, King Arthur is my go-to brand—it's sifted and reliable. Don't skip the sifting, though—those lumps will show up in your cake. And if you're feeling fancy, superfine sugar dissolves better, but regular granulated works in a pinch (just pulse it in a food processor first).
No cream of tartar? One extra egg white does the trick (add 1 tbsp extra lemon juice too). Short on berries? Freeze extras and thaw them overnight—they'll be just as juicy. The whipped cream can be made ahead (up to 4 hours before serving), but don't overwhip it or you'll get butter. For the vanilla, pure extract is non-negotiable—imitation won't give you that same bright flavor. And if you're baking in a humid day, chill your bowl and beaters for 10 minutes before whipping the egg whites to help with stability. Trust me on this one—it's worth the extra minute.
This cake keeps beautifully—cover it tightly and store at room temperature for up to 2 days, or refrigerate for 3 days if you've added the berries. The whipped cream? Make it fresh the day of for the best texture, but you can whip it up to 4 hours ahead and store it in the fridge (just re-whip before serving). For extra sparkle, dust with powdered sugar right before serving. And here's a pro tip: serve with a dollop of whipped cream on each slice—it makes the whole thing look (and taste) even more luxurious. Leftovers? Freeze the cake layers (without cream) for up to 1 month—just thaw at room temp before assembling.
Why You'll Love This Recipe
- No Mixer Needed: I’ll admit, beating those egg whites by hand takes elbow grease—but the result? Light-as-air crumb that’s worth every second. (And if you’re lazy like me, a handheld mixer does the job in minutes.)
- Berry-Bright Magic: That first forkful of cake with juicy berries and cloud-like whipped cream? It’s like summer in a plate. The vanilla extract ties it all together—subtle, but you’ll notice it’s missing if you skip it.
- Picnic or Party Star: Slice it for a no-fuss brunch, layer it for a showstopping dessert, or pack it for a picnic. Honestly, I’ve served it at everything from book club potlucks to my kid’s birthday—no one ever asks for seconds, then they do.
- Zero Waste, Double Use: The cake keeps for days (if it lasts that long), and the leftovers? Perfect for breakfast toast or a quick smoothie boost. Between us, I’ve even repurposed the extra whipped cream for coffee toppings. Versatile like that.
Step-by-step instructions for angel food cake with berries and whipped cream
Here's how to create a cloud-like cake with vibrant berry layers and fluffy whipped cream topping!
🍳 Step 1: Whip Egg Whites to Stiff Peaks
Start by separating the 12 whole Large Egg Whites from yolks (save yolks for other recipes!). In a clean, grease-free bowl, beat them on low speed until foamy. Gradually add 1.5 cups Granulated Sugar—about 1 tablespoon at a time—while increasing speed to medium-high. This gradual addition prevents sugar crystals from forming.
Keep whipping for 8-10 minutes until the egg whites form stiff peaks that stand straight when the whisk is lifted. The meringue should look glossy and hold its shape. Here's the thing—don't overmix or you'll get dry, crumbly cake. The meringue should be thick enough to hold its shape but still smooth, not grainy.
👨🍳 Step 2: Fold in Dry Ingredients Gently
In a separate bowl, whisk together the 1.5 cups All-Purpose Flour, 1.5 tsp Cream of Tartar, 1 tsp Vanilla Extract, and 0.5 tsp Salt. Sift the flour mixture over the egg white meringue and fold together using a spatula in a gentle "J" motion. This technique incorporates air without deflating the meringue.
Fold just until the flour disappears—about 10-12 strokes. Real talk: you'll see streaks of flour at first, but resist the urge to overmix. The batter should be thick and glossy, like wet sand. If it looks too runny, whip the meringue for another minute and try again. This ensures your cake stays light and airy.
🔥 Step 3: Bake the Angel Food Cake
Preheat your oven to 350°F and grease a 10-inch tube pan with the 2 tbsp Unsalted Butter (use a pastry brush for even coating). Pour the batter into the prepared pan and smooth the top with a spatula. Tap the pan gently on the counter to remove air bubbles.
Bake for 35-40 minutes until the top springs back when touched and the cake pulls away from the sides. Here's the moment that matters: the cake should be golden brown and the internal temperature should reach 150°F. Don't open the oven door during baking—this causes the cake to collapse. If it browns too quickly, tent with foil after 25 minutes.
🥘 Step 4: Prepare the Berry Layer
While the cake bakes, prepare the berries. Gently toss the 3 cups Fresh Mixed Berries with 1 tbsp Lemon Juice to prevent browning. Arrange them attractively on a serving platter or in individual dessert dishes. I like to create a circular pattern with larger berries on the outside and smaller ones in the center for visual appeal.
Let the cake cool in the pan for 10 minutes, then invert it onto a wire rack to cool completely. This cooling step is crucial—it prevents the cake from becoming gummy. Once fully cooled, slice the cake horizontally into two equal layers. You'll have two perfect rounds ready for assembly.
🍽️ Step 5: Assemble with Whipped Cream Topping
In a chilled bowl, beat the 2 cups Heavy Whipping Cream with the 1 cup Powdered Sugar until soft peaks form. Add the 1 tbsp Lemon Juice and 1 tsp Vanilla Extract, then whip until the cream holds its shape. This acidity helps stabilize the whipped cream for a longer-lasting topping.
Spread a layer of whipped cream on the berries, then place one cake layer on top. Add another layer of berries, then the second cake layer. Top with the remaining whipped cream, creating peaks for that classic angel food presentation. Serve immediately for the best texture—this cake is at its lightest and most delicious when fresh!
Pro Tips For Making Angel Food Cake With Berries And Whipped Cream
- Use Room-Temp Egg Whites: I learned this the hard way—cold egg whites won’t whip as stiff or as light. Take them out of the fridge 30 minutes before starting, or even better, let them sit in warm (not hot) water for 10 minutes. Your cake’s structure depends on this, and you’ll see the difference in how easily they triple in volume.
- Sift Flour Twice: That extra sift isn’t just for show—it removes lumps and aerates the flour, which means a lighter, more even texture. After the first sift, give it a quick shake in the bowl before adding it to the egg whites. Trust me, your cake will be fluffier if you skip the impatient shortcut.
- Check Doneness with the Touch Test: The toothpick trick is overrated—angel food cake is done when the edges pull away from the pan and the center springs back when gently pressed. If it’s still jiggly, give it 5 more minutes. Overbaking dries it out, and you’ll end up with a sad, dense cake instead of the light, airy one you want.
- Whip Cream Last Minute: Store-bought whipped cream loses its fluff in minutes, so don’t make it until you’re ready to serve. If you’re ahead, keep it chilled in a sealed container and rewhip it briefly before adding berries. Freshly whipped cream on fresh cake is the only way to go—anything less feels like a compromise.
Troubleshooting perfect results
Cake Collapses
If your cake sinks in the middle or collapses during baking, it’s usually from opening the oven door too soon or overmixing the batter. Never peek during the first 30 minutes—the temperature drop causes the cake to deflate. Also, ensure your egg whites are whipped to stiff peaks (not soft) and folded gently. If you see a dome forming but the center sinks, your oven might be too hot—try baking at 325°F next time.
Dense or Gummy Texture
A dense or gummy cake often means the meringue wasn’t whipped enough or the flour was overmixed. Whip egg whites until they hold stiff peaks (about 8-10 minutes) and fold the flour in with 10-12 strokes max. If your cake feels gummy, it might not have baked long enough—check for an internal temp of 150°F. Also, don’t overfill the pan—the batter should reach just below the rim.
Whipped Cream Won’t Hold
If your whipped cream turns grainy or doesn’t hold its shape, it’s likely overwhipped or too warm. Chill your bowl and beaters for 10 minutes before starting, and use cold cream straight from the fridge. Add the lemon juice gradually—it stabilizes the cream but too much can cause separation. If it starts breaking, try adding ½ tsp vanilla extract or a pinch of salt to help rebuild structure.
Berries Soak the Cake
Fresh berries can make the cake soggy if not handled properly. Toss them with 1 tbsp lemon juice to prevent browning, then pat them dry with a paper towel before layering. Arrange berries on the cake just before serving—if you assemble too early, the juices will seep into the layers. For extra insurance, brush the cake layers with a light syrup (equal parts water and sugar) before adding berries.
Uneven Layers
If your cake layers aren’t level or crumble when slicing, it likely didn’t cool completely before cutting. Let the cake cool in the pan for 10 minutes, then invert it onto a wire rack to cool at least 1 hour before slicing. Use a serrated knife and a ruler to guide straight cuts—press down firmly but don’t saw back and forth. If the layers are uneven, trim the top layer slightly before stacking.
Cake Sticks to Pan
Even with butter greasing, angel food cake can stick if the pan isn’t prepped properly. Line the pan with parchment paper cut to fit the bottom and sides (leave an overhang for easy removal). After baking, run a thin knife around the edges to loosen the cake, then invert it gently onto a cooling rack. If it still sticks, your pan might need more butter—or try flouring the parchment lightly before adding the batter.
Nutrition facts
Frequently asked questions
Can I substitute store-bought whipped cream for homemade?
Yes, but with a few adjustments! Store-bought whipped topping works in a pinch, but it's less stable and may not hold its shape as well. For best results, use 1 cup cold heavy whipping cream mixed with ½ cup powdered sugar and ½ tsp vanilla—whip it until stiff peaks form. The homemade version will give you that signature cloud-like texture and better flavor.
How do I make this dessert ahead of time?
Bake the angel food cake layers 1 day ahead and store them in an airtight container at room temperature. Prepare the whipped cream 4 hours ahead and refrigerate—just re-whip before assembling. Assemble the cake 2 hours before serving so the berries don't make the layers soggy. Keep it refrigerated until ready to serve for the best texture.
What's the best way to serve individual portions?
For single servings, slice the cake into 1-inch thick rounds and place each piece on a small plate. Top with a dollop of whipped cream and a few fresh berries. Use a small piping bag to create elegant whipped cream swirls on top—this makes it look restaurant-worthy! Serve immediately for the lightest texture.
Can I use frozen berries instead of fresh?
Frozen berries work in a pinch, but they'll be softer and release more liquid. Thaw them overnight in the fridge, then pat them completely dry with paper towels before using. For best results, use fresh berries—they hold their shape better and add vibrant color. If you must use frozen, toss them with 1 extra tbsp lemon juice to help set their juices.
Why does my angel food cake turn out dense?
Dense cake usually means the egg whites weren't whipped enough or the flour was overmixed. Whip the egg whites to stiff peaks (about 8-10 minutes) and fold the flour in with 10-12 gentle strokes only. Also, make sure your bowl and beaters are completely grease-free—even a tiny bit of oil can prevent proper volume. Check your oven temperature too—350°F is critical!