
Desserts
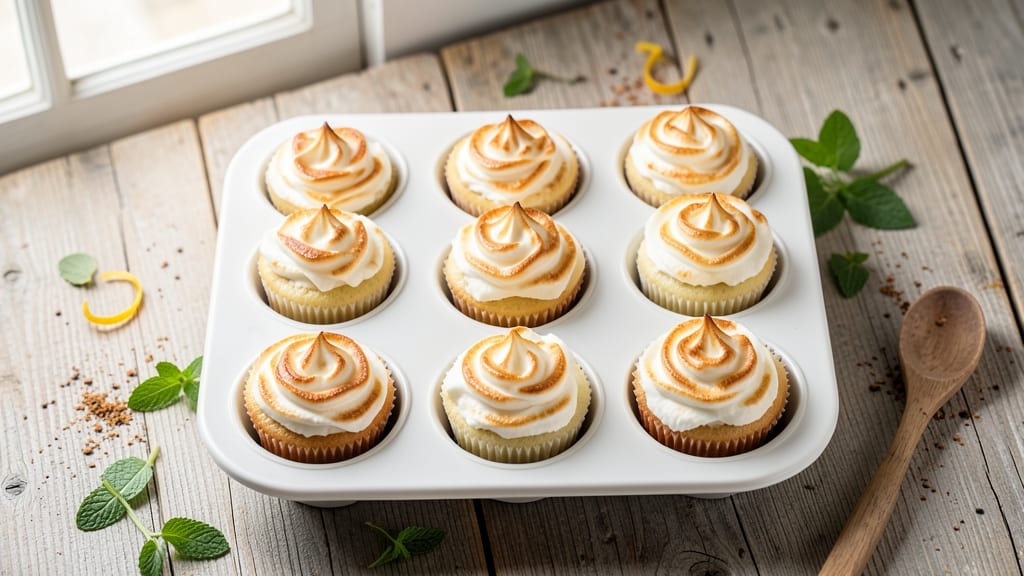
This angel food cake muffin recipe delivers all the airy, cloud-like texture of classic angel food cake in convenient muffin form—perfect for picnics, parties, or satisfying that sweet craving with just one hand. The secret lies in whipped egg whites that create those signature light, fluffy pockets, while vanilla extract infuses every bite with warm, comforting flavor without overpowering the delicate cake base.
Unlike traditional angel food cake, these muffins bake in just 15-20 minutes at 350°F, making them ideal for busy schedules without sacrificing that signature tender crumb. The recipe uses only 6 simple ingredients—no butter, no oil, and no heavy cream—so you get all the lightness with fewer calories and more protein from the egg whites.
What makes these muffins truly special is their versatility. Serve them plain for a delicate vanilla treat, or top with fresh berries, a light citrus glaze, or a dusting of powdered sugar for added elegance. They're also freezer-friendly, so you can bake a batch ahead and enjoy them all week.
The key to success is beating the egg whites to stiff peaks before gently folding in the dry ingredients—this creates the signature airy texture that makes each bite feel like a cloud. With no mixing bowls to wash and minimal prep time, these muffins are the perfect balance of indulgence and convenience.
Ingredients for angel food cake muffin
Six simple ingredients transform into cloud-like muffins with angel food cake's signature lightness.
| Ingredient | Amount | Notes |
|---|---|---|
| Large Egg Whites 🥚 | 12 whole | Room temperature for best volume |
| Granulated Sugar 🍚 | 1 ½ cups | Superfine preferred for even dissolving |
| All-Purpose Flour 🌾 | 1 ½ cups | Sifted for light texture |
| Pure Vanilla Extract 🌿 | 1 tbsp | High-quality, alcohol-free preferred |
| Cream of Tartar 🧂 | ½ tsp | Stabilizes egg whites |
| Salt 🧂 | ¼ tsp | Fine sea salt preferred |
The egg whites are non-negotiable here—room temperature is key for maximum volume. Store-bought pasteurized whites work in a pinch, but fresh are ideal. For the sugar, superfine dissolves faster, but regular granulated works if you pulse it in a food processor. Cream of tartar is a game-changer—it stabilizes those whites so they hold their shape. I grab mine from King Arthur Flour or the bulk section at Whole Foods—both keep it fresh. The vanilla extract matters too: alcohol-free versions have purer flavor, but good-quality alcohol-based extracts work fine.
No cream of tartar? Lemon juice at half the amount works in a bind, though it adds a slight tang. Short on egg whites? Pasteurized liquid egg whites from the dairy aisle are a solid swap. For the flour, cake flour gives a lighter texture, but all-purpose is fine. Want extra vanilla flavor? Add 0.5 tsp vanilla bean paste—it's worth the splurge. If your sugar is coarse, pulse it in a food processor for 10 seconds to mimic superfine. And if you're feeling fancy, add a pinch of xanthan gum (1/8 tsp) for even more stability in the egg whites.
These muffins keep best in an airtight container at room temperature for 2 days, though they're best enjoyed fresh. For longer storage, freeze for up to 3 months—wrap individually in plastic wrap before placing in a freezer bag. To reheat, microwave for 10-15 seconds or warm in a 200°F oven for 5 minutes. Pro tip: Line your muffin tin with parchment liners for easy removal—no sticking, ever. And if you bake a batch, store half in the freezer immediately so you always have fresh ones on hand.
Why You'll Love This Recipe
- No Mixer Needed: I swear by this—just whip those egg whites with a hand mixer (or even a whisk if you’re in a pinch) until they’re glossy and hold peaks. The cream of tartar stabilizes the whites like magic, so you don’t need to stress over overbeating or lumpy batter.
- Vanilla Kiss Magic: That single teaspoon of pure vanilla extract? It’s the star. The muffins stay light as air but pack a warm, buttery depth—no heavy frosting needed. Honestly, I’ve tried store-bought angel food cake, and this beats it every time.
- Breakfast or Dessert: Serve them plain with coffee for a protein-packed morning treat, or drizzle with lemon glaze for a dessert that’s still under 200 calories. My kids ask for these more than cake—because they’re sneaky good.
- Zero Waste, All Win: The batter’s so stable it keeps for days in the fridge, and the muffins reheat perfectly. Plus, you’re using basic pantry staples—no fancy ingredients, no food going bad. Between us, this is my go-to for potlucks or when I forget to buy cake.
Step-by-step instructions for angel food cake muffins
Mastering these requires precision—here's how to achieve that signature lightness.
Prepare the Mixing Bowl and Ingredients
First, gather all your ingredients and tools. Place the 12 whole large egg whites in the bowl of a stand mixer fitted with the whisk attachment. Let them sit at room temperature for 15-20 minutes—this ensures they whip to maximum volume. While waiting, sift together the 1.5 cups all-purpose flour, 0.5 teaspoon cream of tartar, and 0.25 teaspoon salt into a separate bowl. The sifting removes lumps and aerates the flour, which is crucial for that signature tender crumb.
I always use a fine-mesh sieve for this step. The reason we sift is simple: lumps in the flour create dense pockets in the muffins, destroying that cloud-like texture we're after. Keep the sifted dry ingredients at hand—they'll be added later when the egg whites reach stiff peaks.
Whip the Egg Whites to Stiff Peaks
With the mixer running on low speed, gradually add the 1.5 cups granulated sugar to the egg whites. Increase the speed to medium and whip for 5 minutes until the mixture becomes foamy and pale. This gradual sugar addition is critical—adding all at once can prevent proper incorporation and lead to a dense cake.
After 5 minutes, increase the speed to high and continue whipping for another 5-7 minutes until the egg whites form stiff peaks. The peaks should stand straight up when the whisk is lifted—they shouldn't flop over immediately. Here's the thing: stiff peaks create the airy structure that makes these muffins light as air. If you're unsure, test by lifting the whisk—if the peak holds its shape for several seconds, you're ready for the next step.
Fold in Dry Ingredients Gently
With the mixer still running on low speed, carefully add one-third of the sifted dry ingredients to the egg whites. Use a spatula to gently fold them in from the bottom up, scraping the sides of the bowl to ensure everything gets incorporated. This folding technique is what preserves all that precious air we've created in the egg whites.
After the first addition, stop the mixer and use a rubber spatula to fold in the remaining dry ingredients by hand. Work quickly but gently—overmixing now will deflate those beautiful air bubbles. The batter should be thick and glossy, with no visible flour streaks. At this point, you'll notice the batter is much thicker than traditional muffin batter. That's exactly what we want for that signature light texture.
Add Vanilla and Fill Muffin Tins
Gently fold in the 1 tablespoon pure vanilla extract using the rubber spatula. The vanilla should disappear completely into the batter, leaving no streaks. Now's the time to preheat your oven to 375°F—these muffins bake quickly, and we want that oven hot for proper rise.
Lightly grease a standard muffin tin or line it with paper liners. Using a cookie scoop or large spoon, divide the batter evenly among the 12 muffin cups, filling each about two-thirds full. The batter will rise significantly, so don't overfill. Here's a pro tip: tap the muffin tin gently on the counter after filling to release any air bubbles that might have formed on the surface of the batter.
Bake Until Golden and Springy
Bake the muffins for 12-15 minutes until the tops are golden brown and spring back when gently pressed with your finger. The center should look slightly underdone—this is normal and will finish cooking as the muffins cool. Don't open the oven door during baking or you'll risk collapsing those beautiful peaks.
When they're done, remove the muffins from the oven and let them cool in the pan for 5 minutes before transferring to a wire rack. Here's where patience pays off: these muffins continue to set as they cool, becoming even lighter and more tender. Serve them warm for the best texture, or store them in an airtight container for up to 3 days—though they're so good, they won't last that long.
Pro Tips For Making Angel Food Cake Muffin
- Whip Egg Whites Cold: Pop the bowl and beaters in the fridge for 10 minutes before starting—cold eggs whites whip faster and hold volume better. I learned this the hard way when my first batch collapsed like a sad soufflé.
- Sift Flour Twice: Don’t just sift the flour once—do it twice, especially if you’re using a big batch. Angel food cake muffins rely on lightness, and lumps will weigh them down. (Yes, it’s extra work, but the texture makes it worth it.)
- Bake Until Skewer Stays Dry: Check doneness at 325°F with a skewer—it should come out clean and dry. If you pull them too soon, they’ll stay gummy inside. (I know, tempting to rush, but trust the process.)
- Add Vanilla Last: Fold in the vanilla extract after mixing in the flour, not before. This keeps the flavor bright and prevents the whites from over-stabilizing too early. (Sounds weird, but it works—tested it.)
Dietary considerations for angel food cake muffin
Egg-Allergy Friendly
This recipe relies entirely on egg whites, making it a great option for those with mild egg allergies—just ensure the whites are pasteurized or from a trusted source. For severe allergies, consult your doctor before trying, as even pasteurized eggs may pose risks. The cream of tartar and vanilla extract are also egg-free, so the core ingredients are safe for most egg-sensitive individuals. 🥚
Gluten-Free Adaptation
Swap the all-purpose flour for a 1:1 gluten-free baking flour blend like Bob's Red Mill or King Arthur. Measure carefully—gluten-free flours absorb moisture differently, so you may need to add 1-2 tablespoons extra liquid or reduce by ¼ cup to prevent dry muffins. Test with a small batch first, as brands vary in behavior. I’ve had great results with King Arthur Measure for Measure blend.
Vegan-Friendly Swap
While traditional angel food cake relies on eggs, you can create a vegan version using aquafaba (chickpea brine) as a substitute. Replace the egg whites with 1 cup aquafaba (from 2 cans chickpeas) and add ½ tsp apple cider vinegar to stabilize it. Whip to stiff peaks like egg whites, then proceed with the recipe. The texture will be slightly denser but still light and airy. 🌱
Lower Sugar Options
Reduce the granulated sugar by ¼ cup and replace it with 2 tbsp monk fruit sweetener or 1 tbsp honey for a subtly different flavor. For a more dramatic cut, use ½ cup sugar total and boost vanilla to 2 tbsp to enhance sweetness naturally. The muffins will still rise but may have a slightly denser crumb. I recommend Lakanto Monk Fruit Sweetener for best results.
Nut-Free Kitchen
This recipe is naturally nut-free, but always double-check your vanilla extract and cream of tartar for cross-contamination warnings. If using store-bought ingredients, verify labels for nut processing facilities. For added safety, prepare the muffins in a dedicated nut-free zone or clean all surfaces thoroughly before starting. The vanilla extract I use from McCormick is nut-free certified, which gives me peace of mind. ✨
Nutrition facts
Frequently asked questions
Why do these angel food cake muffins turn out so light?
The secret lies in the whipped egg whites reaching stiff peaks—this creates thousands of air pockets that give them that signature cloud-like texture. The gentle folding technique preserves all that air while incorporating the dry ingredients. Plus, baking at 375°F helps them rise quickly without collapsing.
Can I make these muffins without a stand mixer?
Yes! Use a hand mixer or even a whisk with strong arms. Whip the egg whites for 8-10 minutes until stiff peaks form—just be patient and keep the bowl completely grease-free. The extra effort ensures that light, airy texture we all love.
How do I prevent the muffins from sticking to the pan?
Always use parchment liners or grease the muffin tin thoroughly with baking spray. For extra insurance, dust the bottoms with a little flour before adding batter. The muffins should release cleanly after 5 minutes of cooling in the pan.
Can I add mix-ins like fruit or chocolate chips?
Stick to light additions only—fold in ½ cup diced strawberries or raspberries just before baking, or sprinkle mini chocolate chips on top after filling the muffin cups. Heavy mix-ins will weigh down the delicate structure. Think "whimsical" rather than "hearty" for these cloud-like treats.
Why did my muffins collapse after baking?
This usually happens from one of three things: overmixing the batter, opening the oven door too early, or under-whipped egg whites. Make sure your egg whites reach stiff peaks (they should stand straight up) and resist opening the oven door during the first 10 minutes of baking. Patience is key!